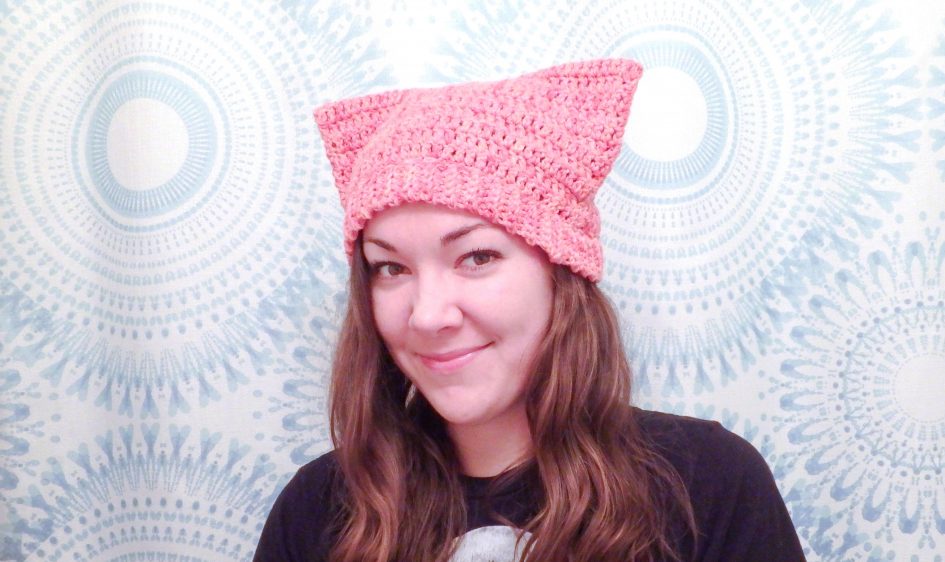
A wonderful movement has been gaining traction on social media in support of the Women’s March on Washington, which is now two weeks away. Floods of bright pink hats with pointed corners emulating cat ears are filling up fiber artists’ feeds thanks to the Pussy Hat Project.
I had noticed lots of knitted hats, but as someone who has always preferred crochet, I decided to take a stab at my own pattern. Using the Pussy Hat Project’s wonderfully illustrated directions as a guide, I created this hat and have outlined steps below.
Note: I threw these steps and photos together in a few hours and they have not yet been tested. Please do let me know if you find any errors or have suggestions.
Sizes
What You’ll Need
- 5.5mm Crochet Hook (AKA Size I/9)
- A large needle (make sure your yarn will fit through the eye)
- Worsted Weight Pink Yarn (I prefer 2 strands of fingering weight twisted together. That works, too!)
Getting Started
The body of the hat and the brim will be worked in separate steps. First crochet the body and fasten off, then sew up the sides, and lastly add the ribbed brim.
Large Adult
Hat Body
Ch 40
1: Dc in 4th ch from hook, 1 dc in each of the remaining chains. Ch 3 and turn. (38 dc) {Piece should measure 11” wide. Adjust number of starting chains if width is greater/less than 11” wide.}
2: Dc in each dc across. Ch 3 and turn. (38 dc) {Note: turning ch3 = dc here and throughout the hat}
3 – 22: Repeat row 2. {Piece should measure 13” tall. Add/remove dc rows if height is greater/less than 13” tall.}
Fasten off. Fold hat in half horizontally and sew sides together. Begin ribbing.
Ribbing
Attach yarn into any dc from last round. Ribbing rows are worked vertically.
Ch 6
1: Sc in 2nd chain from hook and in each of the remaining chains. Slip stitch into dc next to dc where yarn was fastened on. Sl st again in next dc and turn. (5 sc)
2: In back loops only, sc in each sc across. Ch 1 and turn. (5 sc)
3: In back loops only, sc in each sc across. Sl st in next 2 dc and turn. (5 sc)
4 – 76: Repeat pattern created in rows 2 and 3 until ribbing row has been worked around entire opening of hat. Join 1st row of sc with last row of sc with slip stitches, or sew with needle if preferred.
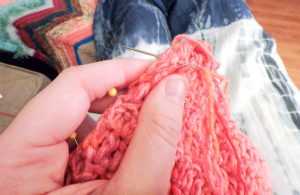
Steps With Photos
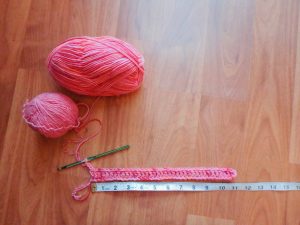
11″ Wide
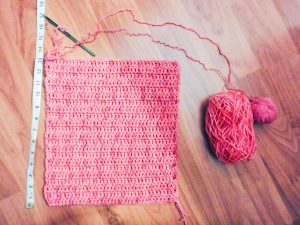
13″ Tall
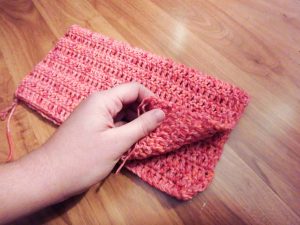
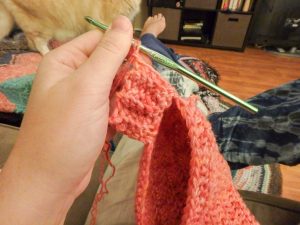
Fold Horizontally
Sew Both Sides
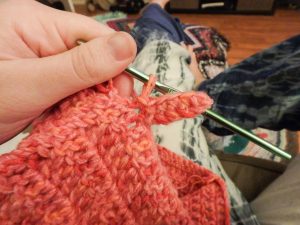
Start 5sc Ribbing
Work in Back Loops Only
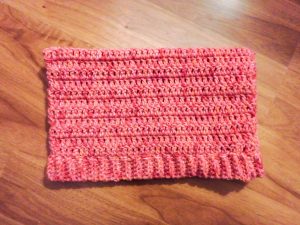
Tada!

Be a Badass Nasty Woman
Regular Adult
Hat Body
Ch 37
1: Dc in 4th ch from hook, 1 dc in each of the remaining chains. Ch 3 and turn. (35 dc) {Piece should measure 10” wide. Adjust number of starting chains if width is greater/less than 10” wide.}
2: Dc in each dc across. Ch 3 and turn. (35 dc) {Note: turning ch3 = dc here and throughout the hat}
3 – 20: Repeat row 2. {Piece should measure 12” tall. Add/remove dc rows if height is greater/less than 12” tall.}
Fasten off. Fold hat in half horizontally and sew sides together. Begin ribbing.
Ribbing
Attach yarn into any dc from last round. Ribbing rows are worked vertically.
Ch 8
1: Sc in 2nd chain from hook and in each of the remaining chains. Slip stitch into dc next to dc where yarn was fastened on. Sl st again in next dc and turn. (7 sc)
2: In back loops only, sc in each sc across. Ch 1 and turn. (7 sc)
3: In back loops only, sc in each sc across. Sl st in next 2 dc and turn. (7 sc)
4 – 70: Repeat pattern created in rows 2 and 3 until ribbing row has been worked around entire opening of hat. Join 1st row of sc with last row of sc with slip stitches, or sew with needle if preferred.
August 10, 2017 at 8:32 pm
I am a major cat lover.
Hope you don’t mind my sharing the instructions, several of my friends are huge supporters of local humane society.
August 10, 2017 at 8:40 pm
Hi Sue – absolutely, share away! 🙂
October 2, 2017 at 9:43 pm
Thank you so much for posting this pattern! I just finished mine and love how it looks. I plan on making more for my friends ^.^
October 13, 2017 at 3:27 pm
Yay! So Happy you love it! 🙂
December 19, 2017 at 10:49 pm
I can’t wait to make this hat.
January 12, 2018 at 5:25 pm
Wearing this hat to the Woman’s March 2018. Thanks for the pattern!
October 21, 2018 at 2:54 am
I have just started working on this and I am doing it in gray so it will match my winter wardrobe. So far I am loving this pattern. It is super easy. Thank you for sharing your pattern with the rest of us.